Book Bundles…

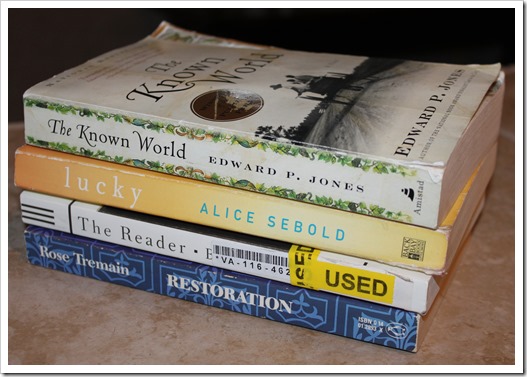
I’ve seen them, I’ve bought them, but never tried to create them myself.  I want more to display on a shelf…So when I was at the thrift store recently, I found myself wondering the book section thinking that maybe I could ‘try’!  Thinking of what I would want the top book to say, I chose these titles ~ “The Known World”, “Lucky”, “The Reader” and my favorite title, “Restoration”. $4. is what I paid for the lot.

IMG_2949

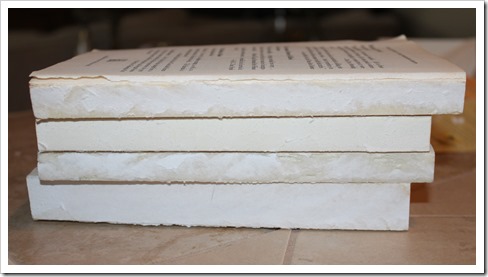
I ripped off the covers of the books and this is what they looked like…not quite what I had in mind that they should look like…they just look to new.

IMG_2961

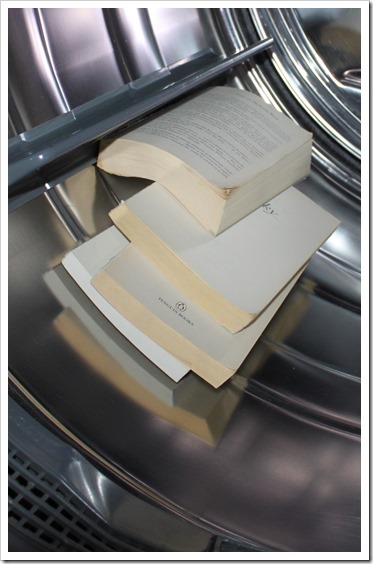
Now don’t laugh…but I decided to throw them in the dryer with a bit of steam going at the same time to see what that would do.  All that really happened was some of the pages bent.

IMG_2962

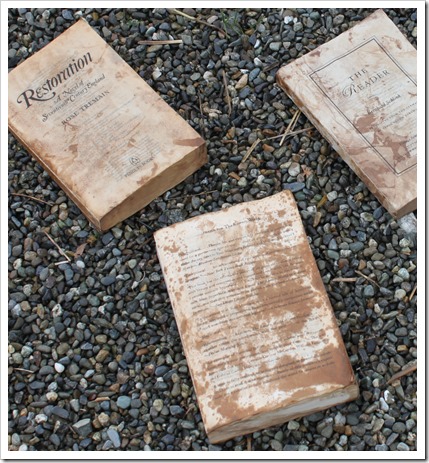
Then I tried dipping them in water mixed with water based dark stain. I love the fact that I have a gravel area where I can set things to dry and not worry about staining anything.  None the less, this was not my brightest idea, because not only did it take a couple of days to dry ~ they stunk too!

IMG_2977

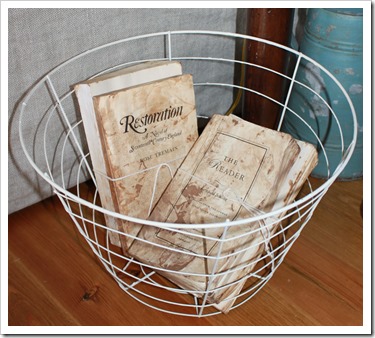
Reasons like this craft project, are reasons why I am afraid to ‘try’ because it is proof that sometimes we fail ~ I did make the best of it and once I wrapped twine around the books and put them on display, but result is still not what I’d hoped for.

IMG_3060IMG_3066

Appreciate any feedback that I might do differently, should I chose to ‘try’ again! 

To see where else I am linking to this week – please check my “Cottage Links” label…xoxo, tracie
PS – Follow Fishtail Cottage on Facebook / Pinterest

Comments

Jenny said…
Next time you could try staining them with tea or coffee. Maybe randomly paint them, spritz them, ect. Rough up the edges some. It really only matters what the outside looks like.

I've never tried to age paper though.
Julie Marie said…
Hi sweetie... next time soak them in a basin filled with warm water and a tea bag... let them soak overnight, then lay them out in the sun to dry... works great!... xoxo Julie Marie
Ggomez said…
First thing I thought of was tea as well! Set in sun to dry...maybe leaving tea bag or ripping open bags leaving bits to add deeper color while it dries?
Ok now I have to try!
I think they look pretty good for your first try. I agree with the other ladies that tea would have worked. You can also take a brown stamp pad and sponge to darken the edges of the pages.

XO,
Jane
awal.ny said…
I have to agree with the soaking in tea water. I accidentally left a book out in the rain. It was soaked. Left in the sun to dry, the pages were puffed up and instant age. Good luck. Never give up trying new things. Alaina
Susie said…
How very clever. I have seen the backs torn off and numbers stamped on the book's spine. xoxo,Susie
Unknown said…
Funny, I just read a tutorial on aging paper yesterday. Her recommended technique was to pour strong coffee over the papers, leave them for 5 minutes and then dry them in an oven for 5 minutes - no longer because the paper would curl.

You can find the how-to over at the Graphics Fairy's brag Monday posting yesterday. Just follow the link for the featured candles (can't remember the name of the blogger, sorry).
Unknown said…
"A" for effort! ha ha! I've never tried to actually "distress" newer books. All of my book bundles are actual vintage hardcover ones. it's hard to duplicate what time does naturally. sigh...(yours look lovely though. truly!)
I was going to suggest tea too, or you could try "Distress Ink." It's an ink pad with a "stain" look to it specifically made for use on papers, fibers, photos and lots more. :) You just pick up the whole ink pad and rub it over whatever surface you're working with. I was just using it this morning to distress some shelves. I posted a pic of it on Instagram (chels70) It works really well. I got mine at Michael's in the "walnut stain" color. :)
This is how wonderful things are created! This could have gone either way!! They aren't horrible-just not the "look," you wanted. I suppose the tea bags and coffee stain would be perfect. My daughter made a gorgeous wreath from coffee stained coffee filters-so this must be the way to go!
Happy Hugs-
jemma
I think they look great but understand the "pain" involved. I actually dry-brushed some stacks using chalk paint and then just roughed them up using metal files on the edges. Rosemary at Villabarnes also adds pages to the top of the existing book and just distresses and ages that top page. I've done that too and it looks great -- no sense in trying to age all of the pages no one will see once they're bundled. Just age the top and edges.
Hi Tracie! Actually, I kind of like them this way! I like the way the stain looks on the fronts. Maybe you could rough them up a little with a nail file to make the page ends look older. You may want to try tea dying next time, but not saturating the whole book, just the covers and ends. Heck, run it over with the car, throw it around in the dirt, let the dog have it for a while. Seriously, just get some more cheap books and do whatever you can think to them until you get what you like. I did some one time and left the covers on and spray painted them, roughed them up with sand paper and tied three into a bundle. Don't worry about failing - there is no fail in creativity! :) Good luck and let me know if you try anything. Hugs, Leena
I think your books look quite authentically aged. I'm sure the smell will dissipate after a while (maybe set them back outside in the sun for a few more days to speed that up). The tea/coffee ideas sound reasonable too. We used to "age" school projects with milk brushed on paper and baked in a low oven for a while (we just watched until they had browned sufficiently). I think I would also age the string used to tie the books together. My parents' house was full of spotty books ... but I doubt you want to put the books in a damp basement and wait 35+ years for the results ;) Wendy
I really like the look, but I know what a pain it is when something doesn't smell good or takes a long time to dry. Now you know one way you don't want to do it, and we have learned from your trial and error. I've wanted to do this too, but hadn't gotten around to trying. Thanks for paving the way!
Liz
sweet violets said…
I don't think you failed!!! They look great!!! I think the tea method sounds best and only doing the top page and also staining the string. I use the ink pad method on the edges of papers and like the look. Keep trying and learning!!!
I love the way they turned out, and I love that you put them in the dryer!! I am featuring tomorrow at Redoux, it is all about BOLD! I have a huge giveaway going on too, so be sure to stop by. Thanks for sharing. -K
Anonymous said…
I think they look pretty cool!! I like the try, try again approach you have!
Anonymous said…
I am a bit late to add to the mix but here are a couple more suggestions. Make some really strong coffee with instant coffee and just enough water to make it fluid and able to be sprayed out of a spray bottle. Randomly spray the front and backs as well as the sides just enough so you have little spots and spritzes all over. Using a piece of sand paper rough up spots on the edges of the books to emulate places a book would tend to have the most visible wear - then use your finger dipped in the strong coffee and dab here and there the spots you just sanded. Try this on a piece of copy paper first to get the hang of it. Once you have the look you like do it to your books. Also, a lot of these distressed books I've seen displayed as a stack tied together with twine or a pretty piece of ribbon. I think you did a great job for the first try!
I hear you about the not wanting to try because of the chance of failure... I'm guilty of that as well but remember, sometimes great things are discovered from those mistakes! :D
Hugs,
Beth P
I found that instant coffee mixed with water help for the antique look. Let the books sit for some time in the water and then dry in a sunny spot.
Thanks for sharing you project.
Regards
Sandra
De Oude Huize.

Popular Posts